There are already a plethora of custom ROMs, official support for custom recovery, as well a plentitude of mods available for this series. And as of now, we will show you the welcome one of the most popular custom ROMs onto your device. Given here are the detailed instructions steps to install LineageOS 19 based on Android 12 on Samsung Galaxy S10E/S10/S10+/S10 5G Exynos devices. Follow along.
Install LineageOS 19 [Android 12] on Samsung Galaxy S10E/S10/S10+/S10 5G Exynos
The below process requires a factory reset. This will wipe off all the data from your device. So make sure to take a complete device backup beforehand. Droidwin and its members wouldn’t be held responsible in case of a thermonuclear war, your alarm doesn’t wake you up, or if anything happens to your device and data by performing the below steps.
STEP 1: Install Android SDK
First and foremost, you will have to install the Android SDK Platform Tools on your PC. This is the official ADB and Fastboot binary provided by Google and is the only recommended one. So download it and then extract it to any convenient location on your PC. Doing so will give you the platform-tools folder, which will be used throughout this guide.
STEP 2: Enable USB Debugging and OEM Unlocking
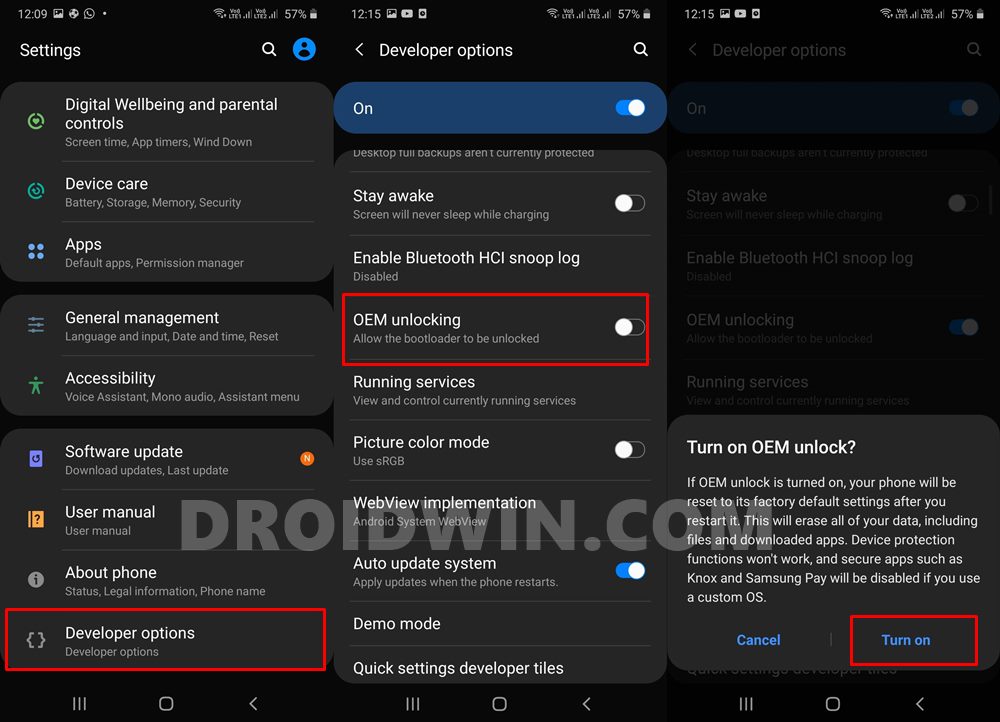
Next up, you will also have to enable USB Debugging and OEM Unlocking on your device. The former will make your device recognizable by the PC in ADB mode. This will then allow you to boot your device to Fastboot Mode. On the other hand, OEM Unlocking is required to carry out the bootloader unlocking process.
So head over to Settings > About Phone > Tap on Build Number 7 times > Go back to Settings > System > Advanced > Developer Options > Enable USB Debugging and OEM Unlocking.
STEP 3: Unlock Bootloader
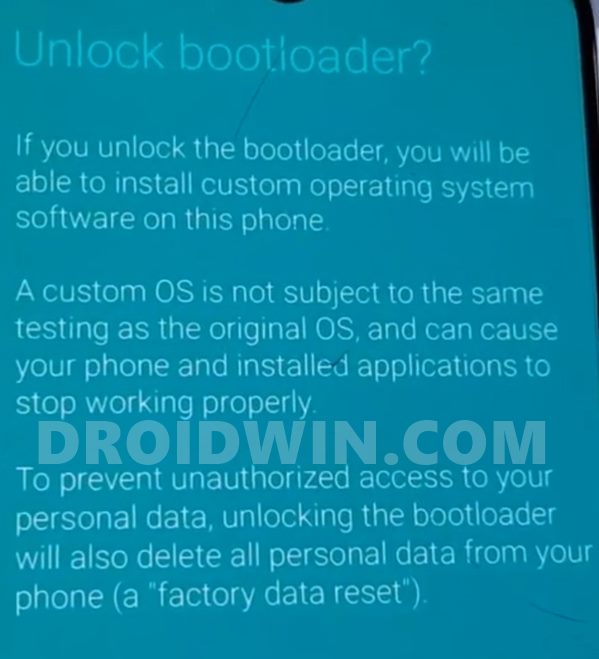
Next up, you will also have to unlock the device’s bootloader. Do keep in mind that doing so will wipe off all the data from your device and could nullify its warranty as well. So if that’s all well and good, then please refer to our detailed guide on How to Unlock the Bootloader on any Samsung Device [New VaultKeeper Method].
STEP 4: Install TWRP Recovery on Samsung Galaxy S10 Series
You will also have to install the TWRP Recovery onto your device in order to flash the LineageOS 19 [Android 12] ROM. So please refer to our guide on How to Install TWRP Recovery on Samsung Galaxy S10/S10E/S10+/S10 5G.
STEP 5: Download LineageOS 19 for Galaxy S10 Series
You may now get hold of the LineageOS ROM for your device from the following link: Download LinkMake sure to download the ROM corresponding to your device’s codename: S10e = beyond0lte | s10 = beyond1lte | s10+ = beyond2lte | s10 5g = beyondxIf you want to install Google Apps and Services, then download the GApps package from here: GApps for Android 12.
What’s Working:
Wi-FiSoundmali driversUSB tetheringVideo PlaybackFingerprint SensorRil (Mobile data, calls, SMS and stuff)SensorsBluetoothWifi HotSpotMTP2D and 3D gpu accelerationHW encoding/decodingGPSCameras (All of them)HWcomposer (HWC)Signal indicatorDouble-tap to wake
Bugs
According to the Developer: ” VoLTE and VoWiFi will not be implemented (for now) as they heavily depend on Samsung’s framework”
STEP 6: Boot to TWRP
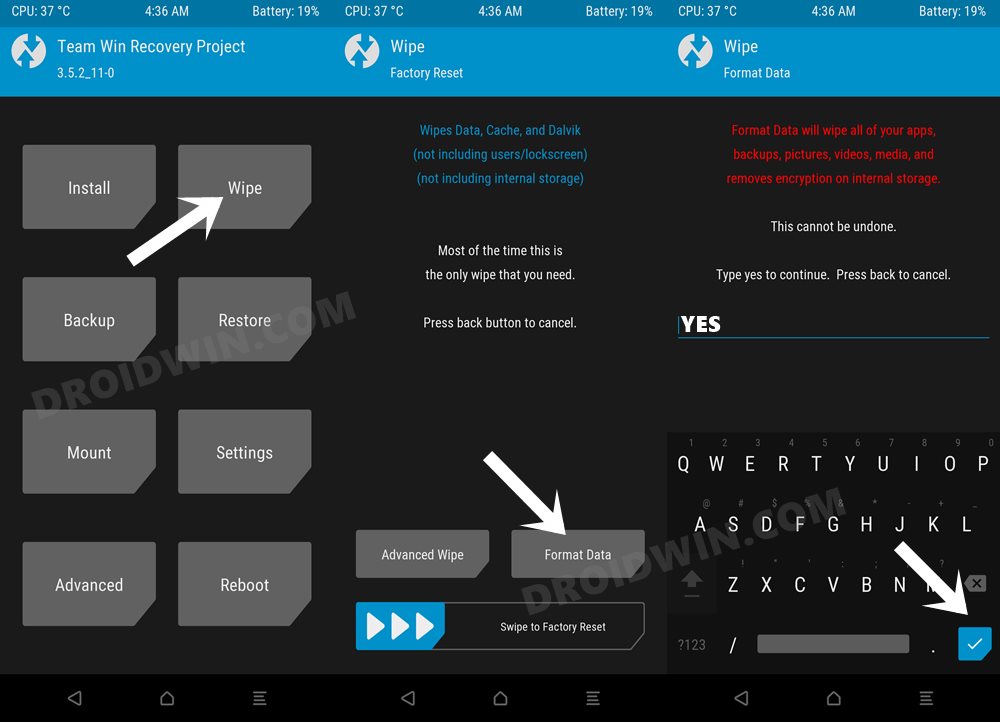
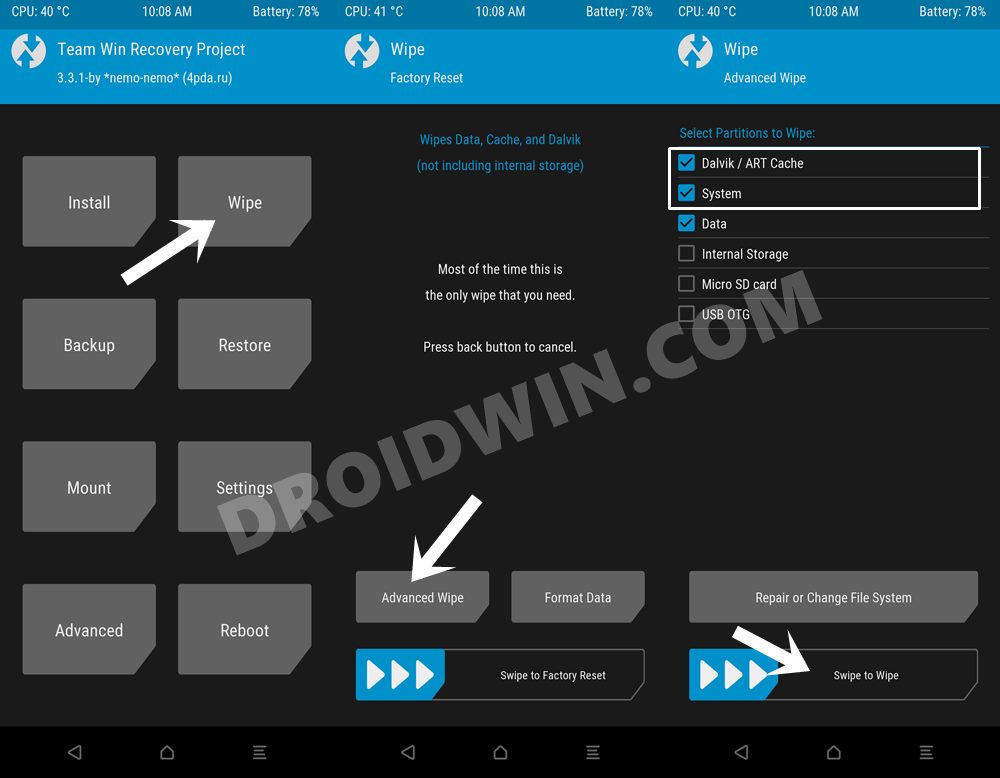
STEP 7: Format Data via TWRP
STEP 8: Transfer Files to Device via TWRP
Now that the format is completed, you could transfer the ROM and GApps file to your device via TWRP. For that, you may take the help of ADB Sideload, Mount, or USB OTG. feature [How To Transfer or Install Files via TWRP Recovery- 3 Methods].
STEP 9: Flash LineageOS 19 [Android 12] on Samsung Galaxy S10
That’s it. These were the steps to install LineageOS 19 based on Android 12 on Samsung Galaxy S10E/S10/S10+/S10 5G Exynos devices. If you have any queries concerning the aforementioned steps, do let us know in the comments. We will get back to you with a solution at the earliest.
About Chief Editor


